Rewrite git history using bash script
BASH GIT GitKraken GitLabMost developers who use git version control knows the problem that sometimes you are working from a different machine and git username and email are misconfigured there. In this case the following problem happens: you make a commit and push but not on your own credentials. In this article we will check how to handle this problem and rewrite the git history.
Problem
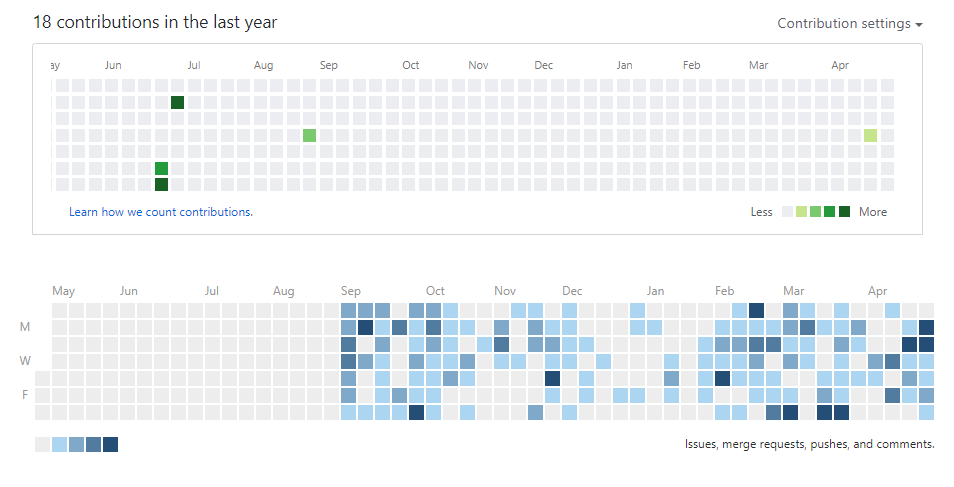
So the problem is mentioned in the introduction above and obviously it does matter that a given commit is under your name or a it’s different person’s name. It can be a problem in bigger companies where distributed computers are used and you forget to configure your username and email in git before starting working. Also, git activity is a good measure. GitLab and GitHub has pre-built activity graphs as the image shows below.

Project
We will create a simple project for a calculator class. We will create different users and make modifications on the code – representing a situation where different people work on the same code base in the repository.
Creating different users
In git we have the ability to create global or local users. For this article we will create local users only, which means that these will only be visible for the current repository. In case of local user creation, we have to be in the git project from the command line! The only difference is the --global switch.
Global user creation
git config --global user.name "Tony Stark"
git config --global user.email "tony@starkindustries.com"

#Check if the setting was successfull, should output the new name
git config user.name
Local user creation
git config user.name "Tony Stark"
git config user.email "tony@starkindustries.com"

#Check if the setting was successfull, should output the new name
git config user.name
Coding the calculator class
We simply create a small .cs file where a calculator class is implemented. The concept is that we create small increments by different users. For example we create the base class by user1, then adding methods by user2 and so on. We also create some merging which we will resolve and that’s all. The full calculator class is this not shown here, it’s so simple.
Output
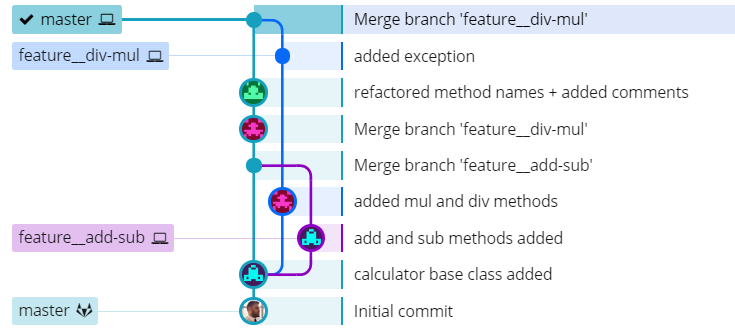
After the code – implemented by different users – is done, the output can be seen from GitKraken (but other alternatives are good too). The image below shows the graph of our repository. Note that different avatars mean different users. The middle purple/pink one is named Tony Stark, which we created above.

The problem (again)
Imagine that we are Tony Stark but instead of using the currently used email address, we would like to use a different one. Or even worse, we are not even Tony Stark… So we have to find a way to rewrite all the commits made by us to our real name.
Solution
In order to solve this, we have to use a bash script which will rewrite us the (raw) git history and change the author info.
Step 1
Before running the script below it’s an important step to push everything to our repository (even if we are working with a wrong name/email).
Step 2
After everything is up in the remote repository, we have to clone it again into a separate directory with the --bare switch on.
git clone --bare https://website.com/user/repo.git
cd repo.git
Step 3
After it’s done and we don’t experience any error during the cloning we can run the rewriting script from below. Add the new name and new email address, and it’s good to go. It’s important to cd into the git repository as the last step shows above!
#!/bin/bash

git filter-branch --env-filter '

OLD_EMAIL="your-old-email@example.com"
CORRECT_NAME="Your Correct Name"
CORRECT_EMAIL="your-correct-email@example.com"

if [ "$GIT_COMMITTER_EMAIL" = "$OLD_EMAIL" ]
then
    export GIT_COMMITTER_NAME="$CORRECT_NAME"
    export GIT_COMMITTER_EMAIL="$CORRECT_EMAIL"
fi
if [ "$GIT_AUTHOR_EMAIL" = "$OLD_EMAIL" ]
then
  export GIT_AUTHOR_NAME="$CORRECT_NAME"
  export GIT_AUTHOR_EMAIL="$CORRECT_EMAIL"
fi
' --tag-name-filter cat -- --branches --tags
Step 4
After the script is run, we should push back the changes. One important note: if there are protected branches in the repository it may cause problems, so I’d suggest to unprotect all branches (or at least those which are going to be affected), push the changes and then redo the protection. After it’s done we can delete this repository from the computer.
git push --force --tags origin 'refs/heads/*'
End result
As the end result we can clone the updated repository or check it from the GUI of GitLab (or other service). After the script is successfully applied the new username/email should be visible.
From GitLab’s GUI
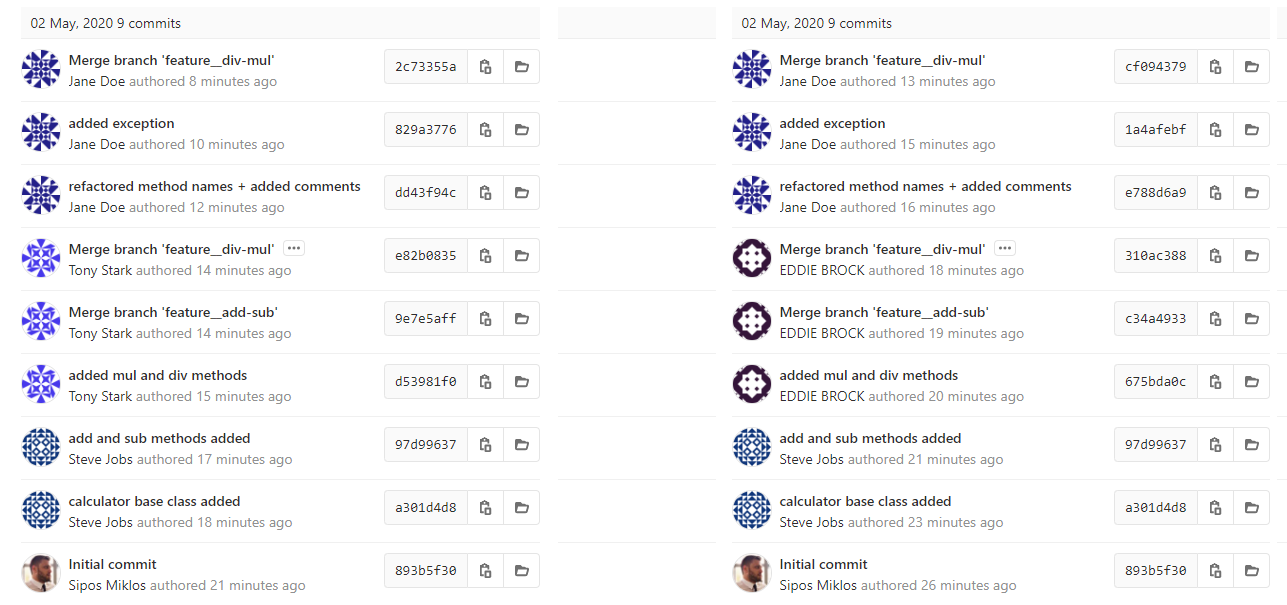
Watching the status from GitLab’s web GUI (in the commits view) we can see the new user “EDDIE BROCK” instead of Tony Stark.

From GitKraken
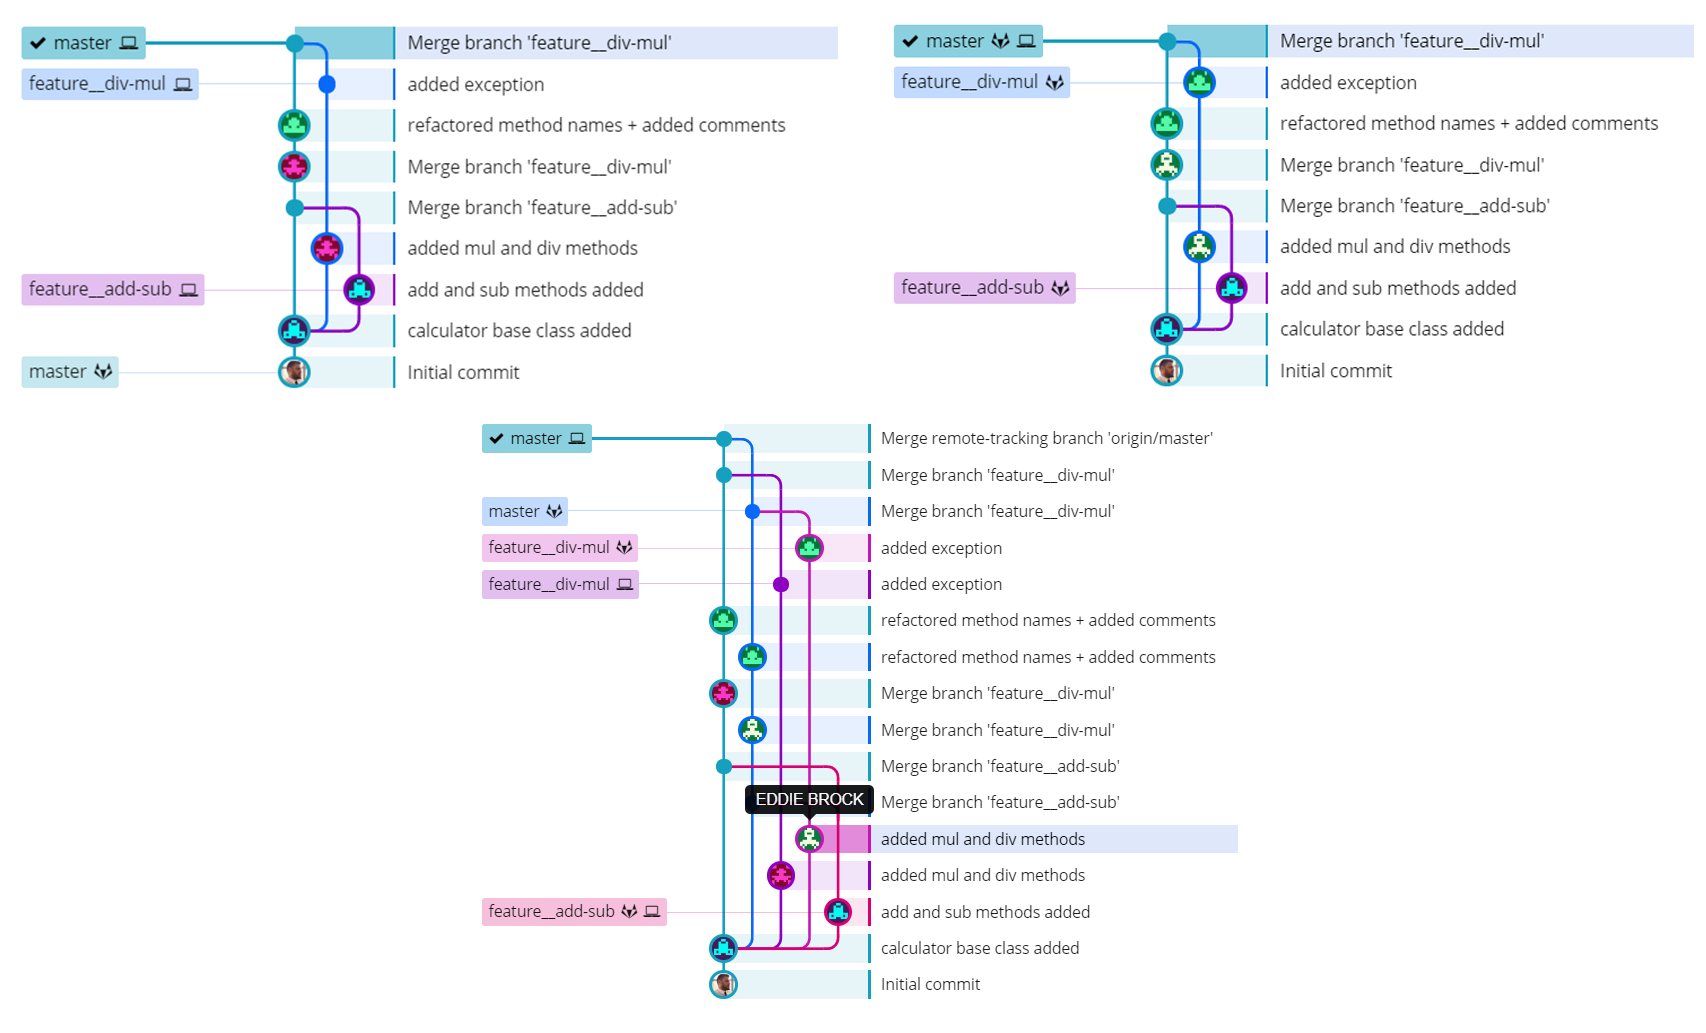
Watching from GitKraken, the new user is also “EDDIE BROCK” (instead of Tony Stark).
In the bottom image where multiple branches appear, we still can find Eddie Brock as the new user, but the only difference in this case is that we had all the previously made local branches. This happens when we pull the changes to the existing repository, instead of cloning the new one.
